CIS-11 Home http://www.c-jump.com/CIS11/CIS11syllabus.htm

Creating Consistent Slides


  1. Creating Consistent Slides
  2. What is a Slide Layout ?
  3. Default Title Slide Layout
  4. Default Title and Text Slide Layout
  5. How to change the Slide Layout ?
  6. What are AutoLayouts ?
  7. Apply an AutoLayout to an Existing Slide
  8. Insert a New Slide
  9. Enter Information in a Placeholder
  10. Quick tip: how to duplicate a slide
  11. Entering and Deleting Text
  12. Enter Text into a Placeholder
  13. AutoLayout Placeholder Types
  14. Insert and Delete Text
  15. Enter Text in a Bulleted List
  16. AutoFit button
  17. Horizontal Aligning and Spacing Text
  18. Vertical Aligning and Spacing Text
  19. Change Text Alignment
  20. Adjust Line Spacing
  21. The Page Setup
  22. Modifying the Page Setup

1. Creating Consistent Slides


2. What is a Slide Layout ?


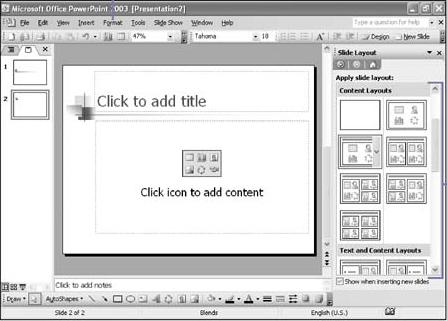
3. Default Title Slide Layout


Default Title Slide Layout
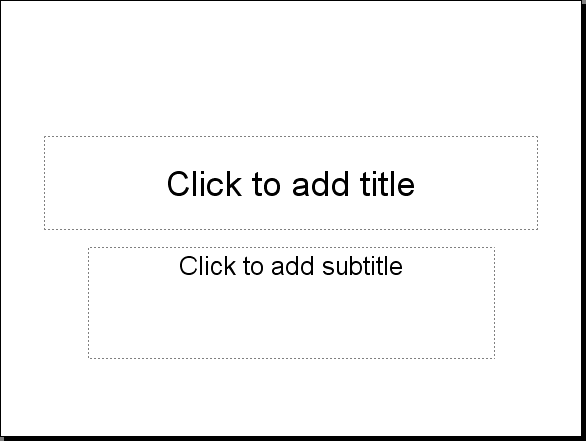
  • The default layout for the first slide in a new presentation is commonly reffered to as a title slide layout.

  • The default layout consists of two text placeholders:

    • one for the presentation title

    • one for the presentation subtitle.

  • The exact positioning of these placeholders comes directly from the Title Master.
4. Default Title and Text Slide Layout


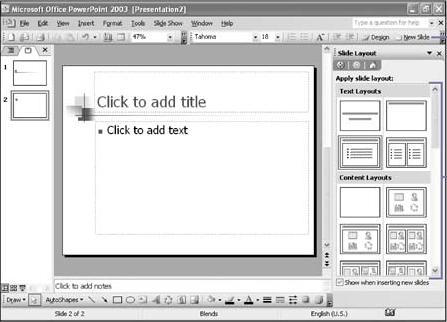
Default Title and Text Slide Layout
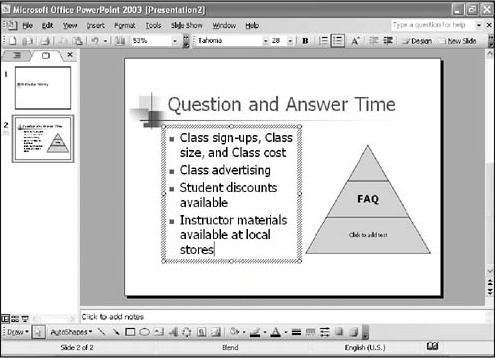
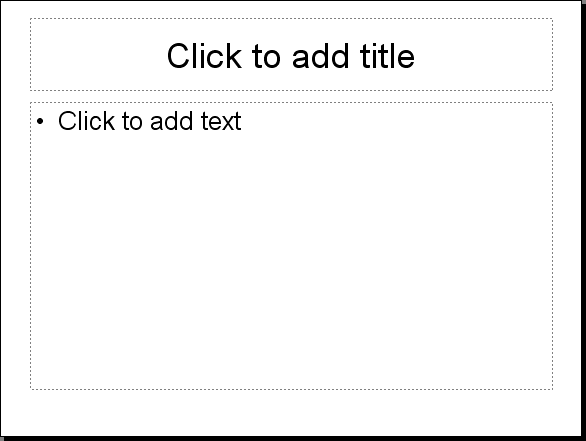
  • The default layout for all the subsequent slides is Title and Text.

  • When new slide is added, the title and text slide layout is used.

  • This layout consists of two text placeholders:

    • one for the slide title across the top

    • a larger placeholder for the actual slide content.

  • The exact positioning of these placeholder textboxes on these two layouts comes directly from the Slide Master.

5. How to change the Slide Layout ?


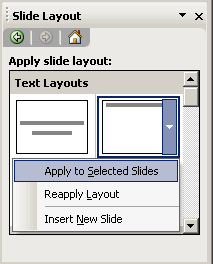
Slide Layout Task Pane
  • Click Format menu, Slide Layout to display the Slide Layout task pane.

  • To apply a new slide layout to the selected slide(s), click on the corresponding slide layout thumbnail.

  • The new layout will be applied to the current slide without affecting the slides content.

  • Once you have changed the slide layout you can close the slide layout task pane.

6. What are AutoLayouts ?


7. Apply an AutoLayout to an Existing Slide


Apply an AutoLayout to an Existing Slide
  • In Normal view,

    • display the slide you want to change,

    • Click the Format menu,

    • then click Slide Layout.

    • Click the AutoLayout you want.

8. Insert a New Slide


Insert a New Slide
  • Formatting toolbar:

    • Click the New Slide button,

    • Click the AutoLayout you want to use.

  • To delete a slide quickly:

    • In Outline, or Slides pane, or Slide Sorter view,

      select the slide you want, press Delete key.

9. Enter Information in a Placeholder


Enter Information in a Placeholder
  • For text placeholders,

    • click the placeholder,

    • then type the text.

  • For other objects,

    • click the placeholder,

    • then work with the feature that PowerPoint activates.

10. Quick tip: how to duplicate a slide


11. Entering and Deleting Text


12. Enter Text into a Placeholder


Enter Text into a Placeholder
  • In Normal view, click the text placeholder.

  • Enter your text.

  • Click outside the text object to deselect the object at any time.

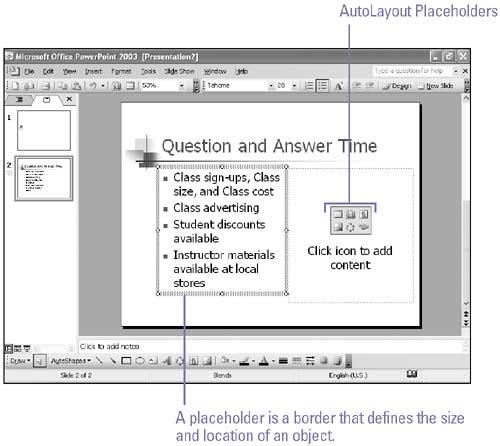
13. AutoLayout Placeholder Types

  • Placeholder

  • Description

  • Bulleted List

  • Displays a short list of related items

  • Clip Art

  • Inserts a picture from the Clip Organizer

  • Chart

  • Inserts a chart

  • Diagram or Organization Chart

  • Inserts an organizational chart

  • Table

  • Inserts a table from Microsoft Word

  • Media Clip

  • Inserts a music, sound, or video clip

  • Picture

  • Inserts a picture from a file

14. Insert and Delete Text


Insert and Delete Text
  • Place the insertion point where you want to insert text.

  • Type the text.

  • To delete text, press

    • Backspace key (deletes left)

    • Delete key (deletes right).

15. Enter Text in a Bulleted List


Enter Text in a Bulleted List
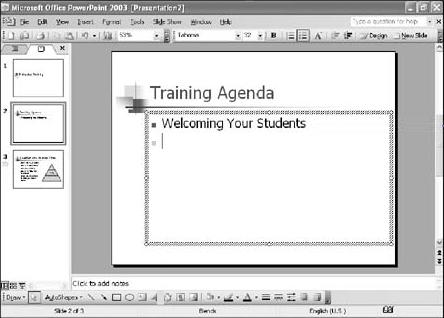
  • In Normal view, click in the bulleted text placeholder.

  • Type the first bulleted item.

  • Press Enter.

  • Type the next bulleted item.

  • Repeat the above steps to complete the list.

  • Tip: Press Tab to indent a level, or press Shift+Tab to move back out a level.

16. AutoFit button


Enter Text in a Bulleted List
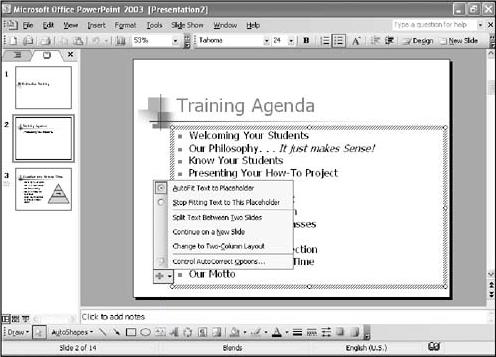
  • If there is more text than can fit on a slide, the AutoFit button appears:

    • Click the AutoFit button

    • Click the option of your choice to fit the text on the slide.

17. Horizontal Aligning and Spacing Text


18. Vertical Aligning and Spacing Text


19. Change Text Alignment


Change Text Alignment
  • Select the text box.

  • On the Formatting toolbar,

    • click an alignment button:

      • Align Left,

      • Align Center,

      • Align Right.

20. Adjust Line Spacing


Adjust Line Spacing
  • Select the text object with the dotted selection box:

    • click anywhere in the paragraph you want to adjust.

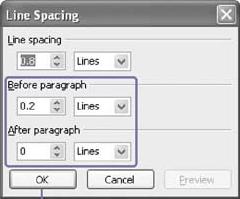
  • On the Format menu,

    • click Line Spacing.

    • click the Before Paragraph or After Paragraph arrows to select a setting.

    • click OK.

21. The Page Setup


22. Modifying the Page Setup


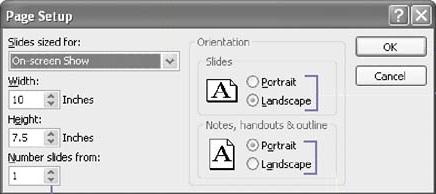
Modify Page Setup
  • Click the Portrait or Landscape option to orient your

    • slides - notes - handouts - outline.

  • To specify the starting page number,

    • click the Number Slides From up and down arrows.

  • Click File menu

    • Page Setup.

    • Click the Slides Sized For list arrow,

    • select the size you want.

  • To customize the slide size,

    • click the Width and Height up and down arrows to enter a specific inches for

      • width

      • height.