CIS-11 Home http://www.c-jump.com/CIS11/CIS11syllabus.htm

Master Slides


  1. What are Master Slides ?
  2. Master Slide Types
  3. Master Slide Tips
  4. What is the Slide Master ?
  5. Slide Master Tips
  6. What is an AutoLayout ?
  7. Master Layout Dialog box
  8. Formatting the Slide Background
  9. Controlling Slide Appearance with Masters
  10. Controlling the Title Slide Master
  11. Slide Master View Toolbar
  12. What is the Title Master ?
  13. Include an Object on Every Slide
  14. Insert a New Master
  15. Apply a Design Template to a Master
  16. Modify Master Placeholders

1. What are Master Slides ?


2. Master Slide Types


3. Master Slide Tips


4. What is the Slide Master ?


5. Slide Master Tips


6. What is an AutoLayout ?


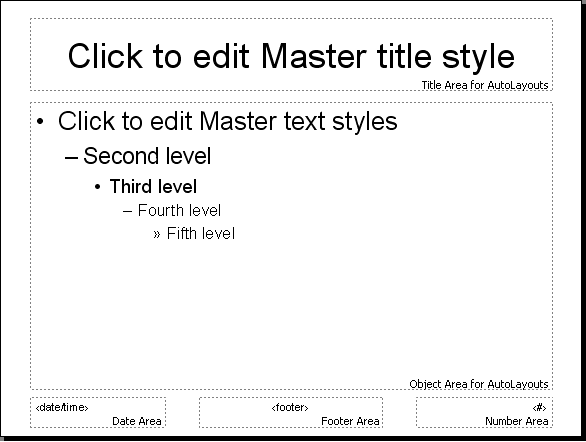
AutoLayout
  • Slide master contains two AutoLayouts:

    • One for the title

    • another one for the main outline text.

  • AutoLayout defines the default formatting for your body text on all slides.

  • In addition, the slide master can contain graphical and text objects that you want to appear on every slide.
7. Master Layout Dialog box


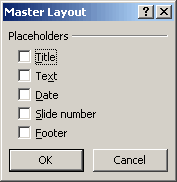
Master Layout Dialog box
  1. Display slide master.

  2. click Format menu, Master Layout.

  • The only checkboxes enabled are those previously deleted from Master.

8. Formatting the Slide Background


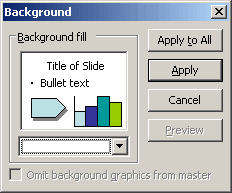
Slide Background Dialog box
  1. Display slide master.

  2. Click Format menu, Background.

  3. Use dialog box options to change the background.

9. Controlling Slide Appearance with Masters


10. Controlling the Title Slide Master


11. Slide Master View Toolbar


12. What is the Title Master ?


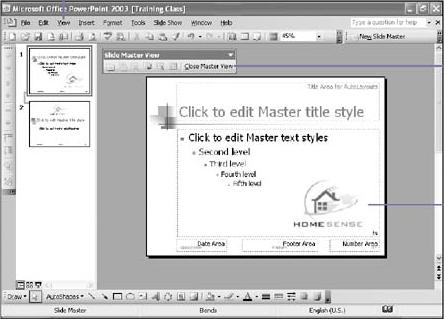
13. Include an Object on Every Slide


Controlling Slide Appearance with Masters
  • Click the View menu,

  • point to Master,

  • click Slide Master.

    • Add the object you want,

    • modify its size and placement.

    • Click the Close Master View button on the Slide Master View toolbar.

  • Tip:

    • click the Normal view button to view the Slide Master.

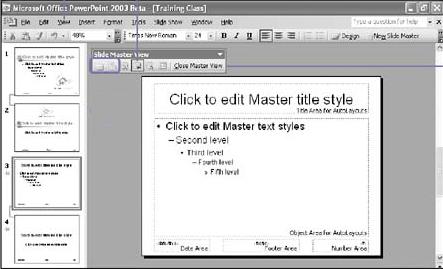
14. Insert a New Master


Insert a New Master
  • Click the View menu,

  • point to Master,

  • click Slide Master.

    • Click the Insert New Slide Master button to insert a new master.

  • Alternatively, on the Slide Master View toolbar,

    • click the Insert New Title Master button.

  • To lock a master,

    • click the Preserve Master button.

  • When done,

    • click the Close Master View button on the Slide Master View toolbar.

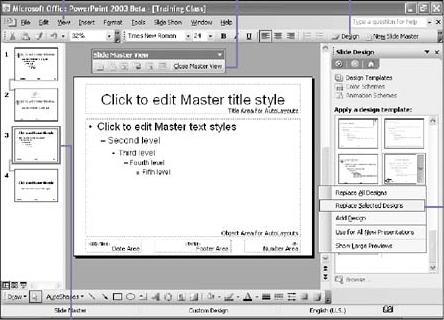
15. Apply a Design Template to a Master


Apply a Design Template to a Master
  • Click the View menu,

    • point to Master,

    • click Slide Master.

    • Select the master slide you want to apply a design.

    • On the Formatting toolbar,

      • click the Slide Design button.

    • Point to the design you want,

      • click the list arrow,

      • and then click Replace Selected Designs.

  • Click the Close Master View button on the Slide Master View toolbar when done.

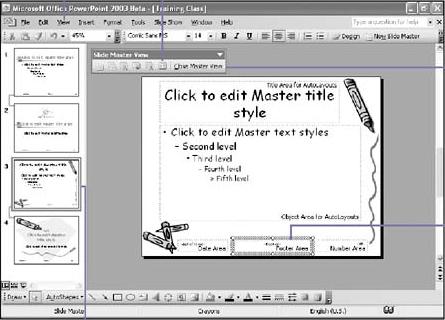
16. Modify Master Placeholders


Modify Placeholders
  • Click the View menu,

    • point to Master,

    • click Slide Master.

    • Select the master slide with the placeholder you want to change.

    • Select the placeholder you want to change.

    • To format the placeholder, use the formatting tools on the Formatting toolbar.

  • To delete the placeholder, press the Delete key.

  • To add placeholders,

    • click the Master Layout button on the Slide Master View toolbar,

    • select the check boxes with the placeholders you want to add,

    • click OK.

  • Click the Close Master View button on the Slide Master View toolbar when done.