CIS-11 Home http://www.c-jump.com/CIS11/CIS11syllabus.htm

Actions, Transitions, and Animations


  1. Delivering a Presentation with PowerPoint
  2. Adding Action Buttons
  3. Insert an Action Button
  4. Test an Action Button
  5. Action: Go to a Specific Slide
  6. Create an Action: Result
  7. Slide Transitions
  8. Creating Slide Transitions
  9. Apply a Transition
  10. Tip: view slide transitions quickly
  11. Set Transition Effect Speeds
  12. Add Sound to a Transition
  13. What is Animation ?
  14. Adding Animation
  15. Object Animation Scheme
  16. Remove an Animation Scheme
  17. Custom Animation
  18. Change an Animation Scheme
  19. Custom Animations
  20. Animation Effects
  21. Animating Text
  22. Steps To Animate Text
  23. Modify the Animation Order
  24. Animate Bulleted Lists
  25. Tip: how to set and show animation timing
  26. Timing a Presentation
  27. Set Timings Between All Slides
  28. Create Timings Through Rehearsal

1. Delivering a Presentation with PowerPoint

  • We want our Microsoft Office PowerPoint presentation to be a complete multimedia production!

  • Visual, sound, and animation effects:

    • transitions and actions between slides.

    • Animations?effects animate slide elements:

      • text flying in from the right,

      • control over each element of the slide.

  • Presentations may differ for one audience or another.

  • PowerPoint supports custom slide shows:

    • only a selection of slides,

    • alternative order you want.

  • Also:

    • Tools to time your presentation making sure it is neither too long nor too short.

    • Narration and music.

    • Printable speaker notes and handouts for the audience.

2. Adding Action Buttons


3. Insert an Action Button


Insert an Action Button
  • Click the Slide Show menu.

  • Point to Action Buttons,

    • choose the action button you want.

  • Drag the pointer to insert the action button,

    • release the mouse button when the action button is the size you want.

  • If necessary, fill out the Action Settings dialog box, and then click OK.

  • If the button is custom,

    • right-click the button,

    • click Add Text,

    • type a name.

4. Test an Action Button


Test an Action Button
  • Click the Slide Show View button.

  • Display the slide containing the action button.

  • Click the action button.

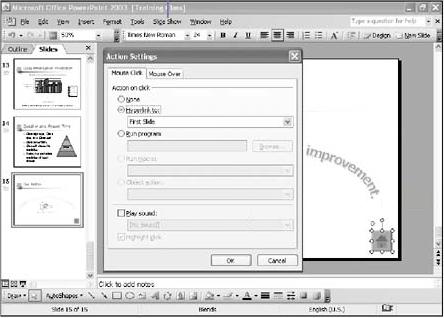
5. Action: Go to a Specific Slide


Action to Go to a Specific Slide
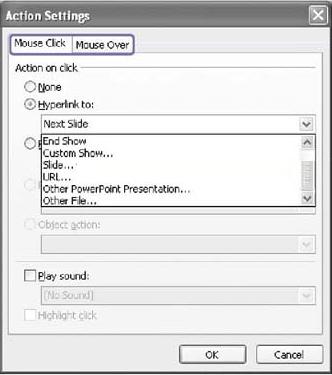
  • Select the text or object in which you want to apply an action.

  • Click the Slide Show menu,

  • click Action Settings.

  • Click the Mouse Click tab or the Mouse Over tab, which determines how the action behaves.

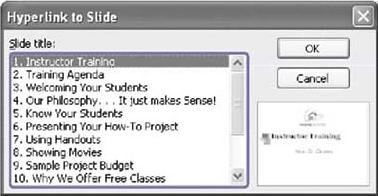
  • Click the Hyperlink To option, click the list arrow, and then click Slide from the list of hyperlink destinations.

Hyperlink
  • Select the slide you want the action button to jump to.

  • Click OK twice.

  • Click outside the action button to deselect it.

  • Run the slide show, and test the action button.

6. Create an Action: Result


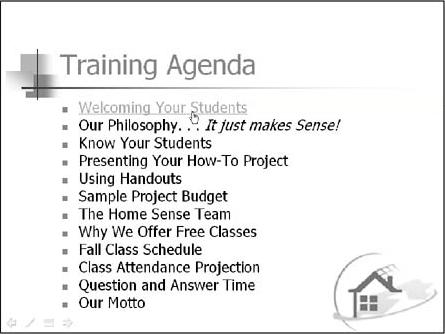
  • Result:

      Hyperlink

  • PowerPoint supports hyperlinks to external places:

    • In the Action Settings dialog box,

    • click the Hyperlink To list arrow,

    • select from

      • URL

      • PowerPoint presentation,

      • another slide show.

  • Also: insert the Return action button to help navigate back in the slide show.

7. Slide Transitions


8. Creating Slide Transitions


9. Apply a Transition


Creating Slide Transitions
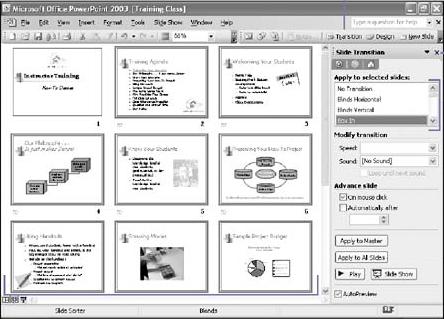
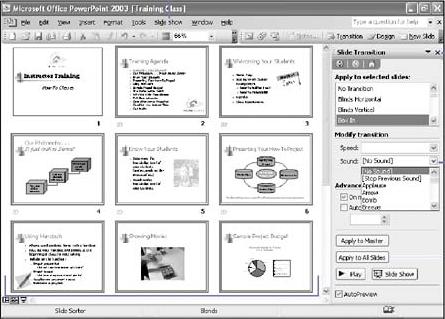
  • Click the Slide Sorter View button.

  • Click the slide(s) to which you want to add a transition effect.

  • Tip: in Normal view,

    • click the Slide Show menu,

    • click Slide Transition to add a transition to a slide.

  • On the Slide Sorter toolbar,

    • Click the Slide Transition button.

  • Click the transition effect you want.

  • Click Apply To All Slides if necessary.

  • When done, click the Close button on the task pane.

10. Tip: view slide transitions quickly


11. Set Transition Effect Speeds


Set Transition Effect Speeds
  • In Normal or Slide Sorter view,

    • click or display the slide(s) whose transition effect you want to edit.

    • Click the Slide Show menu,

    • Click Slide Transition.

    • Click the Speed list arrow,

    • click Slow, Medium, or Fast.

  • To apply the transition effect to all slides, click Apply To All Slides.

  • When done, click the Close button on the task pane.

12. Add Sound to a Transition


Add Sound to a Transition
  • In Normal or Slide Sorter view,

    • click or display the slide to which you want to add a transition sound.

    • Click the Slide Show menu,

    • click Slide Transition.

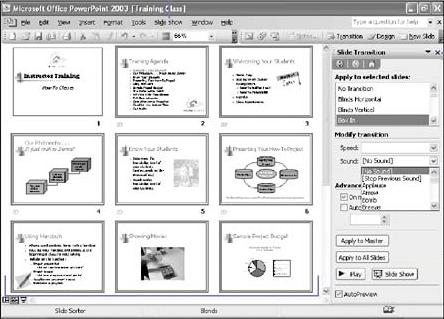
    • Click the Sound list arrow,

    • click the sound you want.

  • To apply the transition effect to all slides, click Apply To All Slides.

  • When done, click the Close button on the task pane.

13. What is Animation ?

14. Adding Animation

  • Custom animation effects introduce objects onto a slide

    • one at a time

    • all animated.

  • Bulleted list can appear as

    • all bullets together,

    • one bullet at a time,

    • all bullets together, emphasized one at a time.

  • Picture or chart can fade gradually into the slide's foreground.

  • Many kinds of animations schemes are available:

    • some preset animations contain sounds

    • Customized animations designed by you with your own special effects and sounds.

15. Object Animation Scheme


Apply an Animation Scheme
  • Select the slide or object you want to animate.

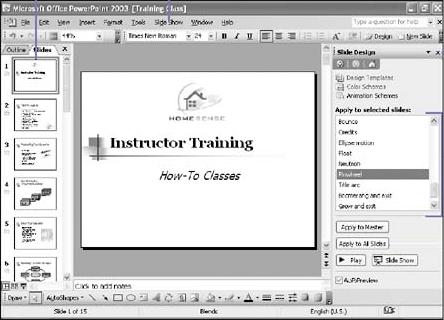
    • Click the Slide Show menu,

    • click Animation Schemes.

    • Click the animation you want.

  • To apply the animation scheme to all slides, click Apply To All Slides.

  • To preview the animation, click Play.

  • When done, click the Close button on the task pane.

  • Tip: to view an animation quickly, goto Slide Sorter view, and click a slide animation icon.

16. Remove an Animation Scheme


Remove an Animation Scheme
  • Select the slide or object you want to animate.

    • Click the Slide Show menu,

    • click Animation Schemes.

    • Click No Animation.

  • When done, click the Close button on the task pane.

17. Custom Animation


18. Change an Animation Scheme


Change an Animation Scheme
  • In Normal view,

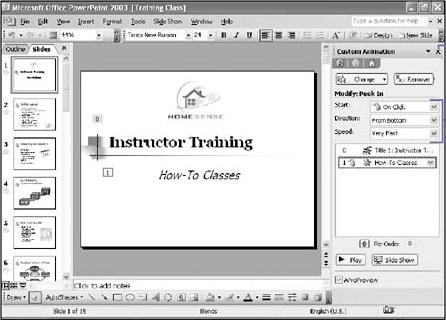
    • right-click the object,

    • click Custom Animation.

  • Click the animation scheme item you want to change.

  • To remove it, click Remove.

  • To modify it,

    • click a list arrow (Start, Direction, or Speed), and then click an option you want.

  • To preview it, click Play.

  • When done, click the Close button on the task pane.

19. Custom Animations


20. Animation Effects


21. Animating Text


22. Steps To Animate Text


Animate Text
  • In Normal view,

    • right-click the selected text object,

    • click Custom Animation.

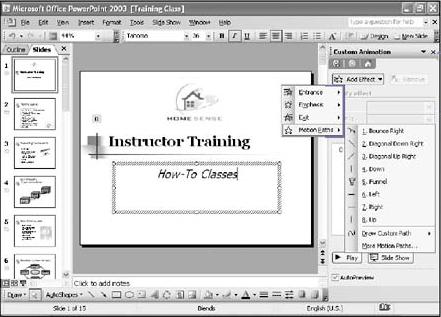
    • Click Add Effect,

    • choose an effect from the list of animation effects.

  • When done, click the Close button on the task pane.

23. Modify the Animation Order


Modify the Animation Order
  • In Normal view,

    • display the slide with the animation,

    • click the Slide Show menu,

    • click Custom Animation.

    • Click the animation effect whose animation order you want to change.

    • Click the Re-Order Up or Re-Order Down arrow button.

  • When done, click the Close button on the task pane.

24. Animate Bulleted Lists


Animate Bulleted Lists
  • In Normal view,

    • right-click the bulleted text,

    • click Custom Animation.

    • Click Add Effect,

    • choose an effect from the list of animation effects.

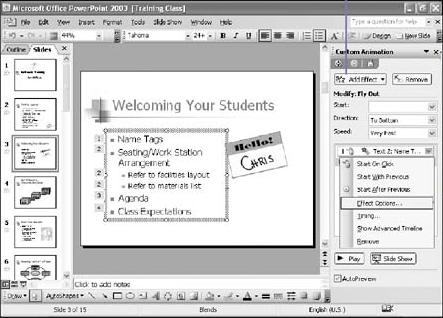
    • Click the animation effect,

    • click the list arrow,

    • click Effect Options.

Animate Bulleted Lists
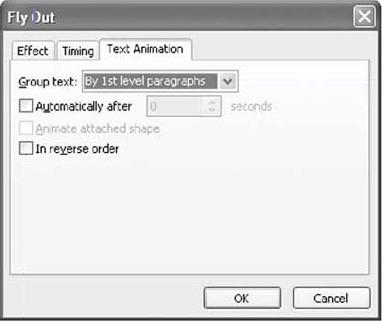
  • Click the Text Animation tab:

    • Click the Group Text list arrow,

    • click at what paragraph level bulleted text will be animated.

  • To reverse the order of the text,

    • select the In Reverse Order check box.

  • To dim text after animation,

    • click the Effect tab,

    • click the Dim list arrow,

    • click an option.

25. Tip: how to set and show animation timing


26. Timing a Presentation


27. Set Timings Between All Slides


Set Timings Between All Slides
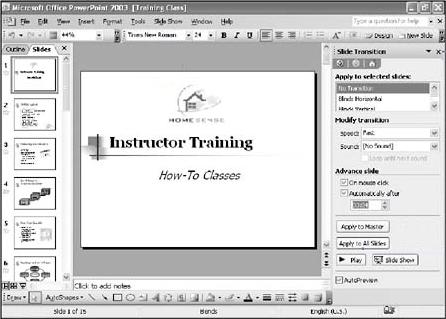
  • Click the Slide Show menu,

  • click Slide Transition.

  • Select the Automatically After check box.

  • Enter the time (in seconds).

    • Note: the presentation will automatically advance to the next slide!

  • Click Apply To All Slides.

  • When done, click the Close button on the task pane.

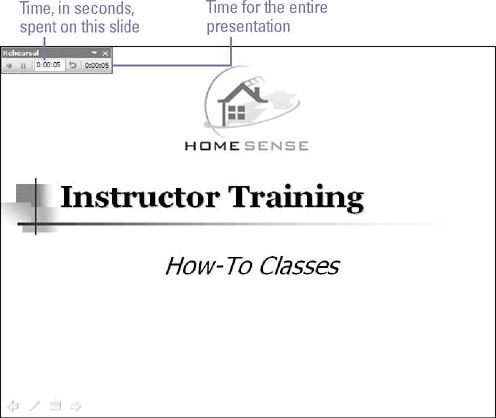
28. Create Timings Through Rehearsal


Create Timings Through Rehearsal
  • Click the Slide Show menu,

  • click Rehearse Timings.

  • As the slide show runs, rehearse your presentation.

  • Click the mouse or press Enter to go the next slide.

  • Click Yes to accept the timings you just recorded.

  • Review the timings in Slide Sorter view.