CIS-11 Home http://www.c-jump.com/CIS11/CIS11syllabus.htm

Header and Footer, Speaker Notes, and Audience Handouts


  1. Adding a Header and Footer
  2. Add a Header and Footer
  3. What are Speaker Notes ?
  4. Preparing Speaker Notes and Handouts
  5. Enter Notes in Normal View
  6. Enter Notes in Notes Page View
  7. What is the Notes Master ?
  8. Format the Notes Master
  9. Header and Footer
  10. What are Audience Handouts ?
  11. What is the Handout Master ?
  12. Format the Handout Master
  13. Previewing and Printing
  14. Preview a Presentation
  15. Print a Presentation
  16. Print an Outline

1. Adding a Header and Footer

  • A header and footer will appear on every slide.

  • Header and footer include information about

    • slide number,

    • date,

    • name of the presenter.

  • The masters store header and footer information.

  • Header and footer also appears on handouts and note pages.

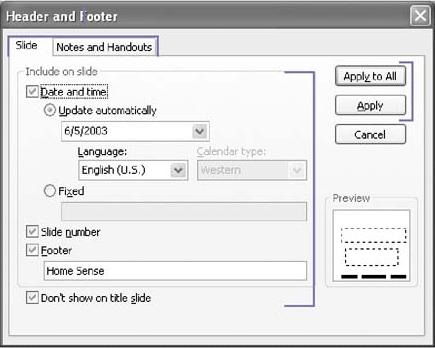
  • Tip: to turn off header and footer on the title slide,

    • Click the View menu,

    • click Header And Footer,

    • click the Slide tab,

    • select the Don't Show On Title Slide check box,

    • click Apply To All.

2. Add a Header and Footer


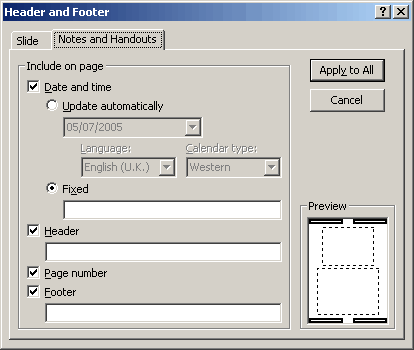
Adding a Header and Footer
  • Click the View menu,

  • click Header And Footer.

  • Click the Slide or Notes And Handouts tab.

  • Enter or select the information you want to include on your slide or your notes and handouts.

  • Click Apply to apply your selections to the current slide.

  • Click Apply To All to apply the selections to all slides.
3. What are Speaker Notes ?


4. Preparing Speaker Notes and Handouts


5. Enter Notes in Normal View


Preparing Speaker Notes and Handouts
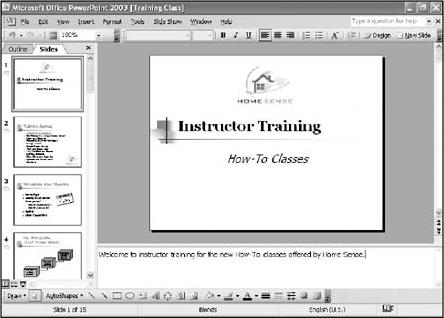
  • First, while in Normal view,

  • switch to the slide for which you want to enter notes.

  • Next, click in the Notes pane,

  • type in your notes.

6. Enter Notes in Notes Page View


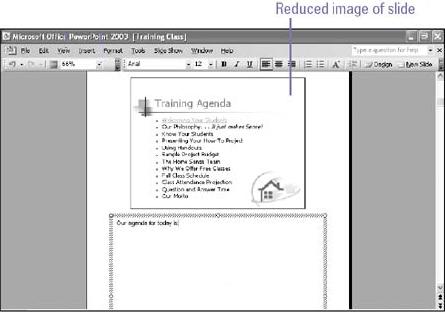
Enter Notes in Notes Page View
  • Switch to the slide for which you want to enter notes.

  • Click the View menu,

  • click Notes Page.

  • If necessary, click the Zoom list arrow,

    • increase the zoom level of text.

  • Click the text placeholder.

  • Type in your notes.

7. What is the Notes Master ?


8. Format the Notes Master


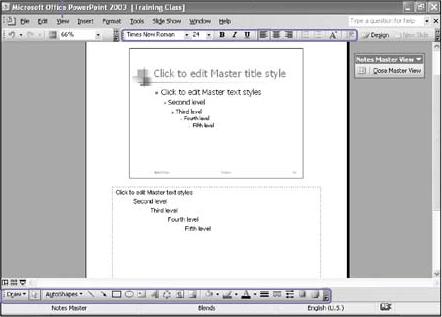
Format the Notes Master
  • Click the View menu,

  • point to Master,

  • click Notes Master.

  • Use the Formatting and Drawing toolbar buttons to format the master.

  • Optionally, add a header, footer, date, and page numbering.

  • Click the Close Master View button on the Notes Master View toolbar.

9. Header and Footer


Header and Footer
  • Click the View menu,

  • Header and Footer,

  • click Notes and Handouts tab.

  • Specify the options you want.

10. What are Audience Handouts ?


11. What is the Handout Master ?


12. Format the Handout Master


Format the Handout Master
  • Click the View menu,

  • point to Master,

  • click Handout Master.

  • Specify how many slides you want per page.

  • Use the Formatting and Drawing toolbar buttons to format the master.

  • Optionally, add a header, footer, date, and page numbering.

  • Click the Close Master View button on the Handout Master View toolbar.

13. Previewing and Printing

  • Avoid duplicate printing!

    • Verify that the slides look ok before printing.

  • Print Preview shows how slides look when printed.

  • The Print Preview toolbar provides the tools to:

    • print slides,

    • outline,

    • notes,

    • handouts,

    • color or black and white mode.

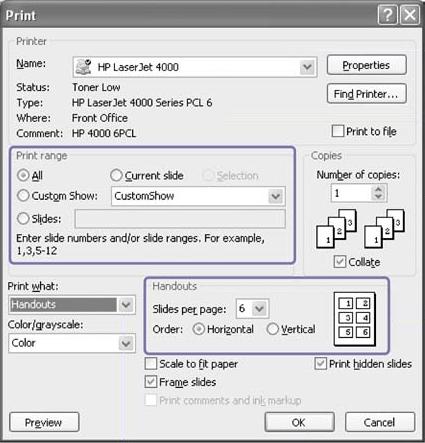
  • The Print dialog box offers standard options to

    • print multiple copies,

    • page ranges,

    • access printer properties.

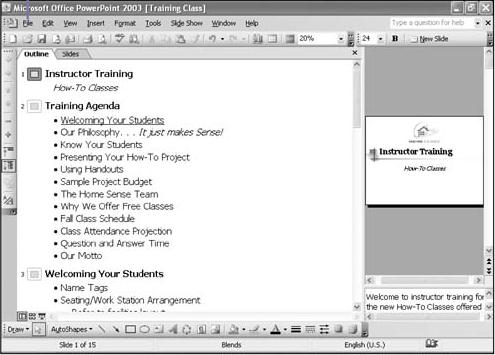
  • When printing presentation outline, PowerPoint prints the outline from the Outline view.

14. Preview a Presentation


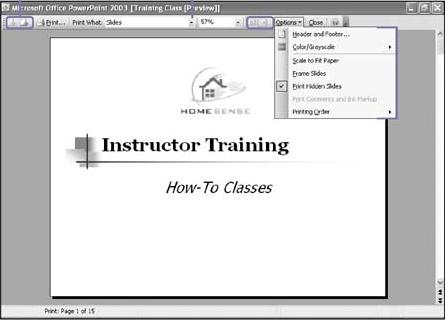
Previewing and Printing a Presentation
  • To change the orientation, click the Landscape or Portrait button on the Print Preview toolbar.

  • Click the Next Page or Previous Page button to navigate between pages.

  • Click the Print Preview.

  • Click the Print What list arrow,

  • select the preview item: slides, handouts, notes, or outline.

  • To change options, click Print Preview toolbar Options button:

    • Header And Footer

    • Color/Grayscale

    • Scale To Fit Paper

    • Frame Slides

    • Print Hidden Slides

    • Print Comments And Ink Markup

    • Printing Order

15. Print a Presentation


Print a Presentation
  • Click the File menu, Print.

  • Select a printer, if necessary.

  • Click the Print What list arrow to specify what you want to print.

  • Select a print range.

  • Specify the number of copies.

  • If necessary, specify the handout settings.

  • Click OK.

16. Print an Outline


Print an Outline
  • In Outline view,

  • display the outline the way you want it to be printed:

    • Display only slide titles or all text levels

    • Display with or without formatting

    • Display with a small or large view percentage

  • Click the File menu, Print.

  • Click the Print What list arrow, and select Outline View.

  • Click OK.